Your hiking boots work hard. Mud, rocks, river crossings, long descents — they take a beating so your feet don’t have to. But if you don’t care for them, they’ll wear out fast, smell terrible, and leave you buying a new pair way sooner than you should.
The good news? A little regular care goes a long way.
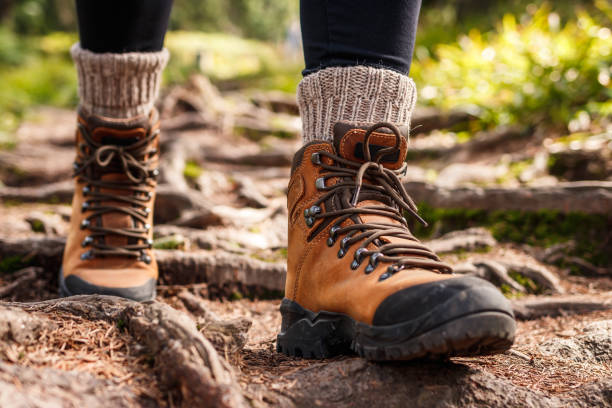
Why Hiking Boot Care Actually Matters
Boots get dirty and wet — that’s just the job. But when moisture sits in the fabric and seams, it breaks down materials from the inside out. Dirt grinds away at the sole. And leather that never gets conditioned? It cracks and stiffens until the boot is more cardboard than shoe.
Caring for your boots isn’t just about keeping them clean. It’s about keeping them working.
How to Clean Hiking Boots the Right Way
Step 1: Knock Off the Loose Stuff
Right after a hike, bang your boots together to knock off mud and debris. Pull out the laces and insoles so everything can dry properly.
Use a stiff brush and cold water to scrub the upper, sole, and tongue. Avoid soap unless it’s a cleaner made for boot materials — regular detergent strips protective coatings.
Step 2: Dry Them Out, But Not Too Fast
This is where most people go wrong. Stuffing wet boots next to a heater or campfire feels like the obvious move, but heat warps the sole, shrinks the fabric, and weakens the glue holding everything together.
Instead, let them air dry at room temperature. Stuff them loosely with newspaper to help absorb moisture from the inside. Give them a full day if you can.
How to Waterproof and Condition Your Boots
Restore the Waterproof Layer
Boots come with a DWR (Durable Water Repellent) coating that wears off over time. When water stops beading on the surface and starts soaking in, it’s time to treat them.
Use a spray-on or wax-based waterproof product designed for your boot’s material. Apply it after cleaning, while the boot is still slightly damp for better absorption.
Condition Leather Boots
If your boots are leather, conditioning keeps the material soft and flexible. Dry leather cracks. And cracks let water in.
Apply a leather conditioner with a cloth, work it in gently, and let it sit. Don’t overdo it. Too much product leaves boots greasy and can actually soften the structure too much. A thin, even coat every few months is enough.
How to Inspect and Repair Your Boots
Check the Laces and Soles
Get in the habit of looking your boots over before every hike. Frayed or snapped laces are an easy fix — keep a spare pair in your bag. Sole separation is trickier but catchable early.
Fix Small Problems Before They Get Big
If the sole is starting to peel at the edges, a boot repair adhesive can buy you more time. Press the sole firmly, clamp it if you can, and let it cure fully before hiking.
That said, if the sole is coming off in chunks or the upper is falling apart, no amount of glue will save it. At that point, it’s time for a new pair.
How to Store Hiking Boots Between Adventures
How you store your boots matters as much as how you clean them.
- Keep them indoors, in a cool, dry place
- Avoid damp garages or sheds where mould can grow
- Don’t leave them outside — rain, sun, and yes, animals can all cause damage
- Store them loosely, not crushed under other gear
- Leave the laces loose so the boot keeps its shape
A breathable bag or box works well for long-term storage.
Quick Recap: Hiking Boot Care at a Glance
| Task | When to Do It |
| Clean boots | After every hike |
| Air dry properly | After every hike |
| Waterproof treatment | Every 3–6 months or when water stops beading |
| Condition leather | Every 3–4 months |
| Inspect laces and soles | Before every hike |
| Deep clean and store | End of hiking season |
Take care of your boots and they’ll take care of you out there. It takes maybe 10 minutes after a hike — far cheaper than replacing a good pair every season.
Leave a Reply